I made the Free sewing pattern Peplum Top by In The Folds. It is a great little pattern that is easy to make and is a good addition to any summer wardrobe and here is my review of the process.
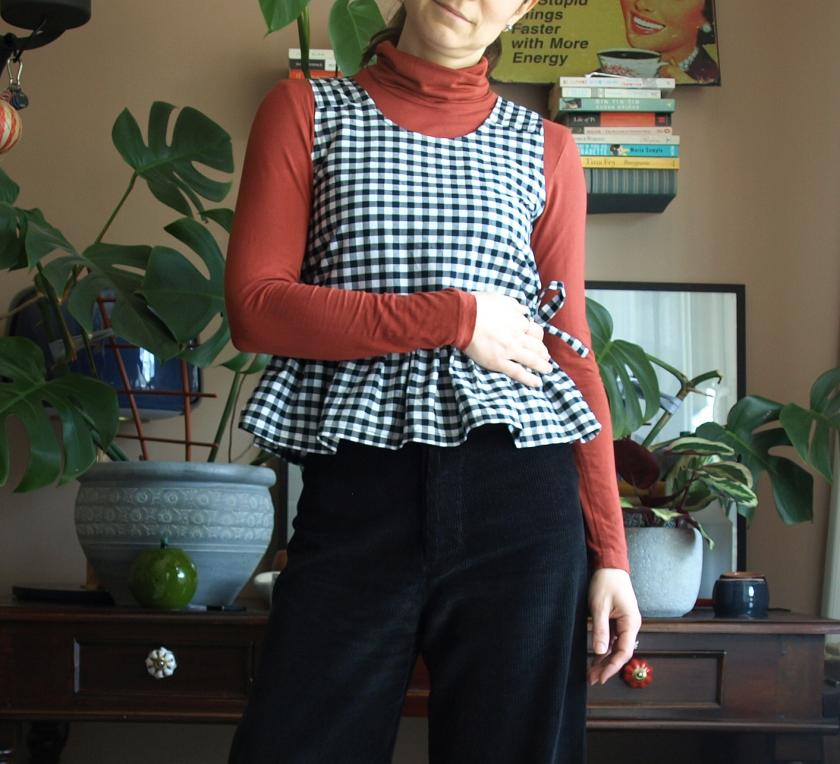
But first a little about the fabric: I love gingham fabric and if I could get my hands on all colors in that pattern I would be wearing it ALL THE TIME. I got the fabric at a local store near me a while ago and I was so in love with it that I bought as much as I could. I made this dress form it and had some remnants that kind of were big enough for something but I was never sure what. And then the In The Folds Peplum top came to play in one of the Peppermint Magazine issues.
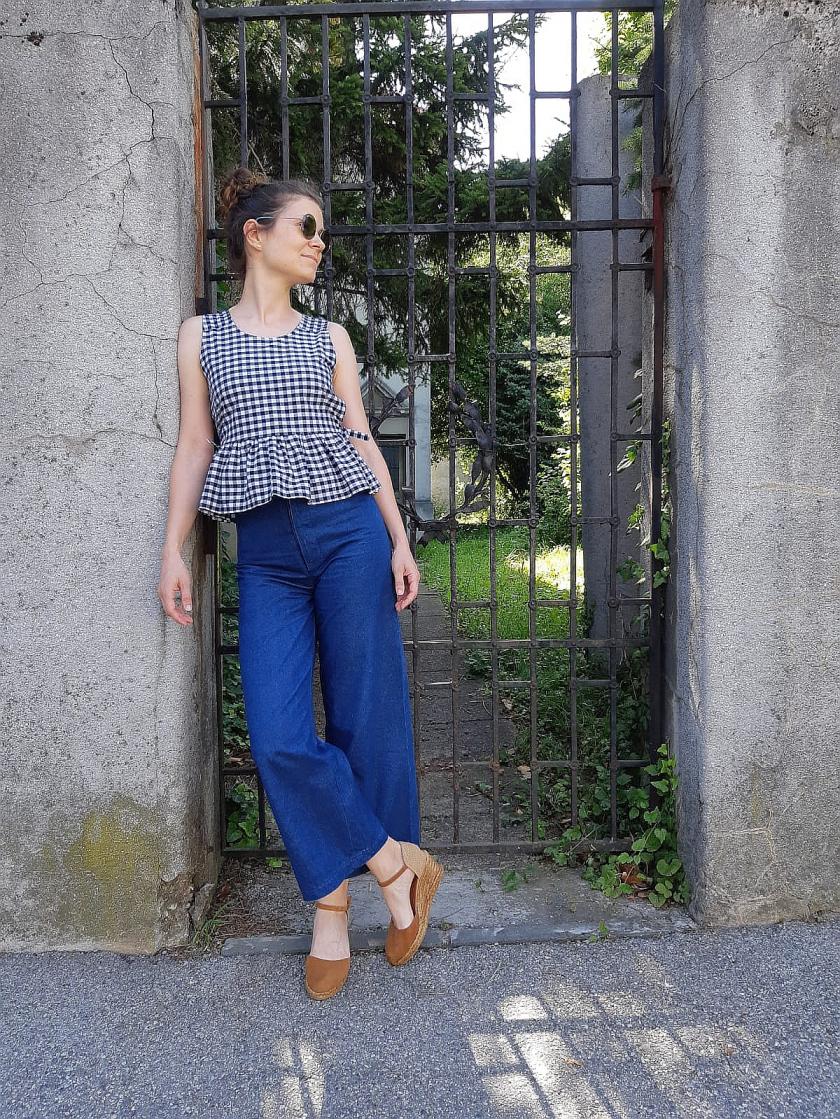
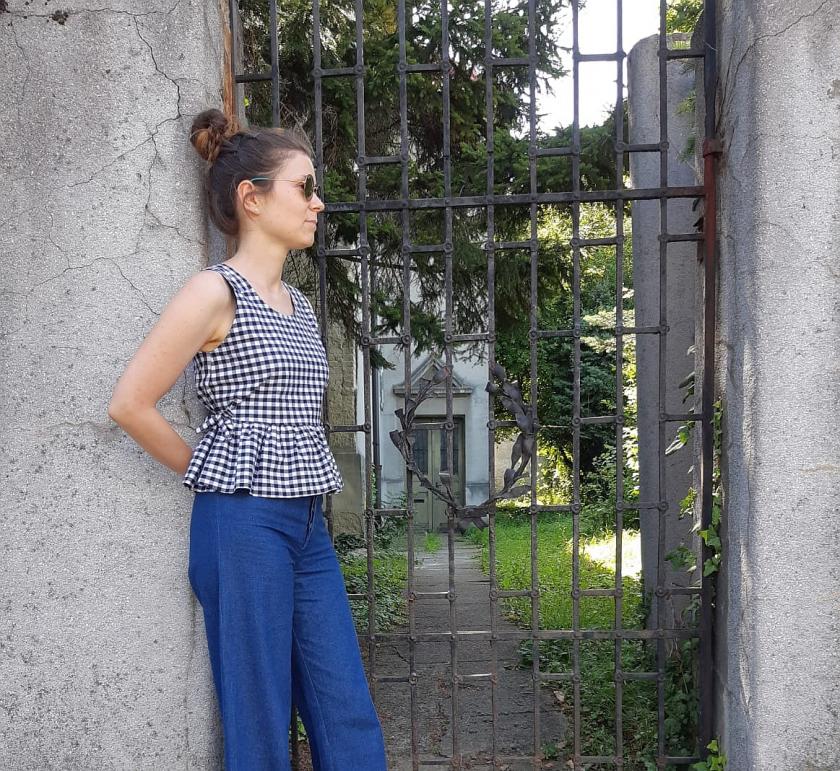
I like how this top is at the same time simple and yet has some interesting details. Like straps as a separate pattern piece and the peplum. The fabric is some kind of cotton so it was on the stiffer side. This meant that the peplum was way more statement like than I had imagined. Also the top wasn’t falling delicately but was sticking out a lot. To workaround that I added side ties so I can tie them into a bow and I love how that looks. Two ties are sewed down on each side of the side seam. This adds a bit more structure and fit in the waist area which I really like. And it turned out it is a great little trick and solution after the fact when the top is already fully constructed.
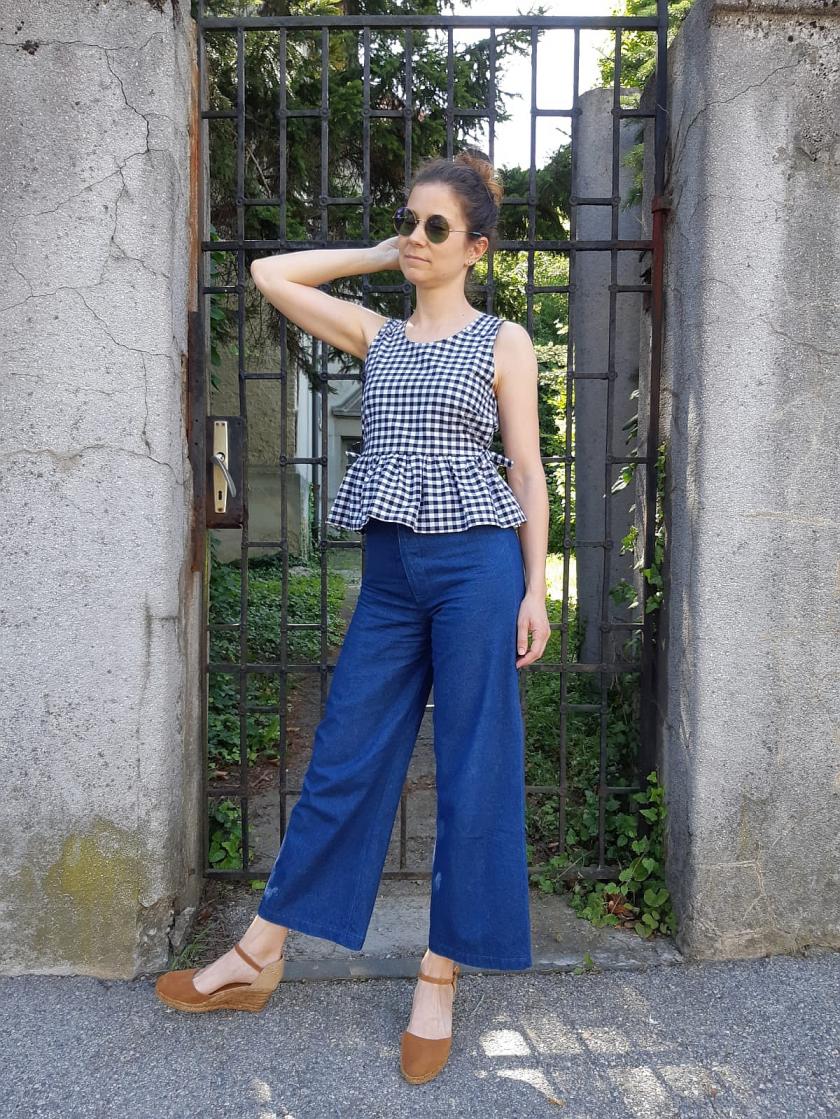
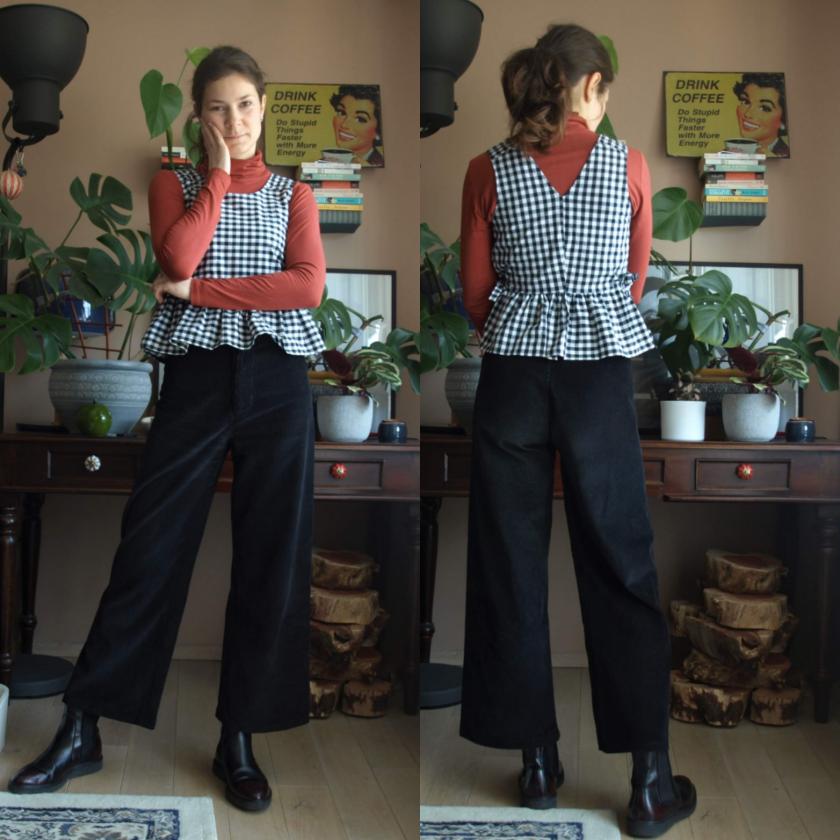
The pattern has a round neckline in the front and v neckline in the back. I like this and it is ideal something something (different drummer kind of thing) for summer. I am looking to see how I can pair it with my existing wardrobe. And how to wear it in non-summer weather. So I had a rummage through my wardrobe and saw this rust Paola turtleneck. I made it some time ago and it was instant heart eyes. I will have to search for more combinations like this. It is great for extending the life of summer clothes and for adding a bit of pop to my winter outfits.
The pattern instructions are great as always with In The Folds and the pattern is easy to construct. I would recommend any of their patterns made for the Peppermint magazine as a great addition to your wardrobe. They are also great for beginner sewists looking for something simple but very wearable and beautiful. I would like to make one in a floatier fabric next time.

Thanks for reading and happy sewing!
Ana
Discover more from Hungry Scissors
Subscribe to get the latest posts sent to your email.
Just found your blog – love your makes, love your style!
Hi Barbara! Thank you so much for this comment, it made my day
I love the addition of side ties and the structure of the fabric! Could you help me understand how to make and add the ties? What are their dimensions? Did you sew them onto the exterior of the shirt?
Thank you Maddie! I made the ties at the very end because this fabric is structured and I did not like how the top was looking, it was sticking out to much on all sides. So I first thought about what length and width I wanted. For the width I got the measurement like this: wanted width X 2 and then added 2cm for seam allowance (1cm on each side). I sewed both long endges and one short with right sides together, then turned them inside out and pressed. Now I had one short side unfinished and I covered it when I was stitching each tie to the top. This part is a bit hard to explain in writing but you can play with the placement and test it out until you get the right position you are happy with. They are not part of the side seam but they are sewed to the top from the outside with about 5 cm space in between so when I tie them they do the work of gathering the top. Hope this is helpful, let me know if you have any more questions.